This tech note describes the process to change, update, setup add or remove Rapidlogger Variables from a PC. The program used to do this operation is called the "Rapidlogger System Utility". This document describes the use of the Rapidlogger System Utility". You should only use version number 2.1.0.35 or newer versions of this utility program The program is available on the CD that is shipped with your system. Before using this program the PC should be connected to the Rapidlogger System with an Ethernet cable and the network setup should be completed. The network setup is described in a different document.
The first step is to install the "Rapidlogger System Utility" program on your PC. To install, double click on the setup.exe file inside the Rapidlogger Utility folder on the CD.
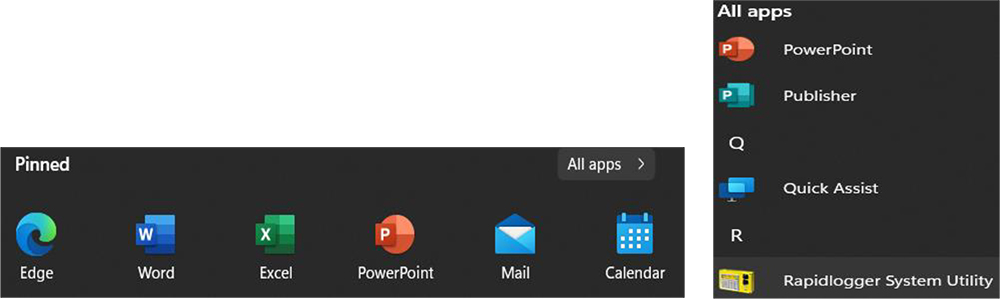
Now run the program by clicking on the program icon for Rapidlogger System Utility in the program menu.
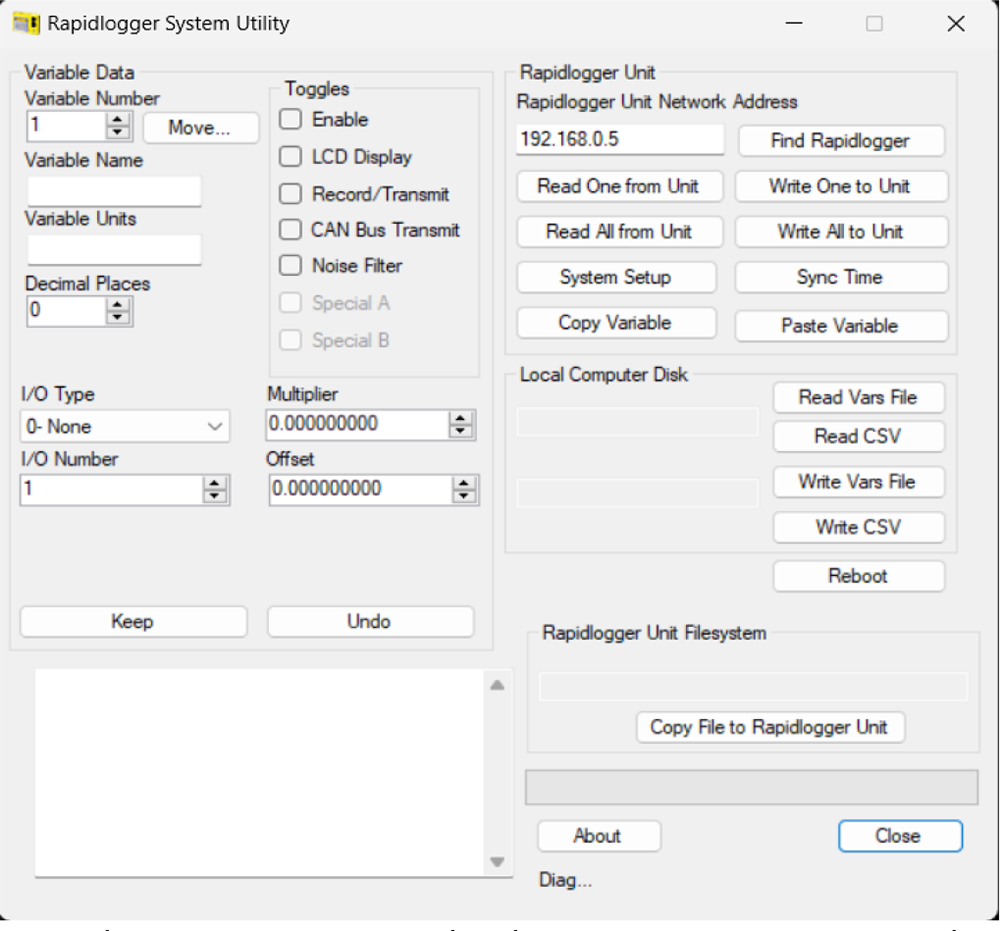
1) Try to ping Rapidlogger System by clicking on the "Find Rapidlogger" button as shown below.
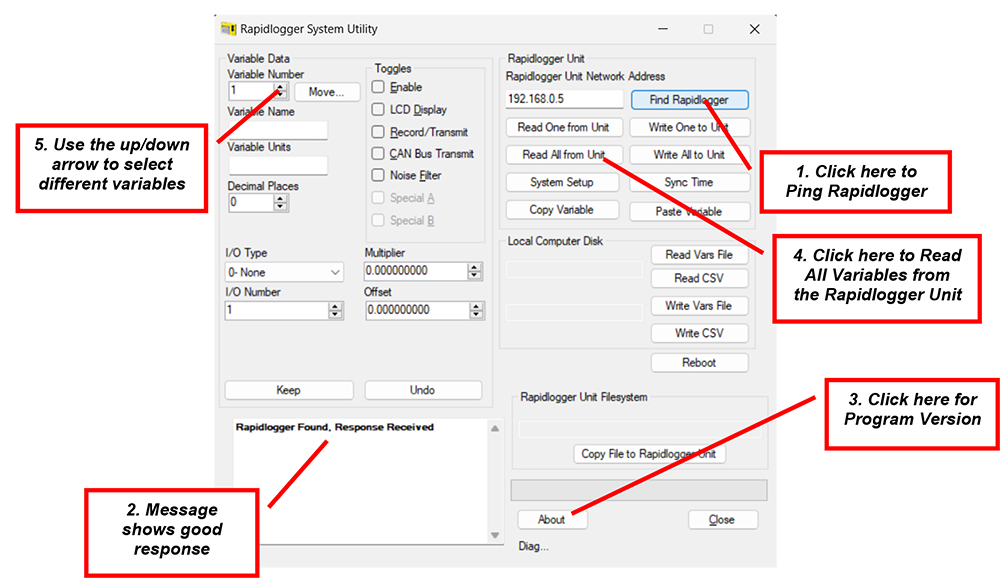
2) If the message in the window shows "Rapidlogger Found, ResponseReceived" then you are ready to proceed. If the message shows"Connection to Rapidlogger Failed" then there is a problem with thenetwork connection and you need to check all of the steps in the networksetup procedure described in the Rapidlogger Tech Note #5 thoroughly andtry again.
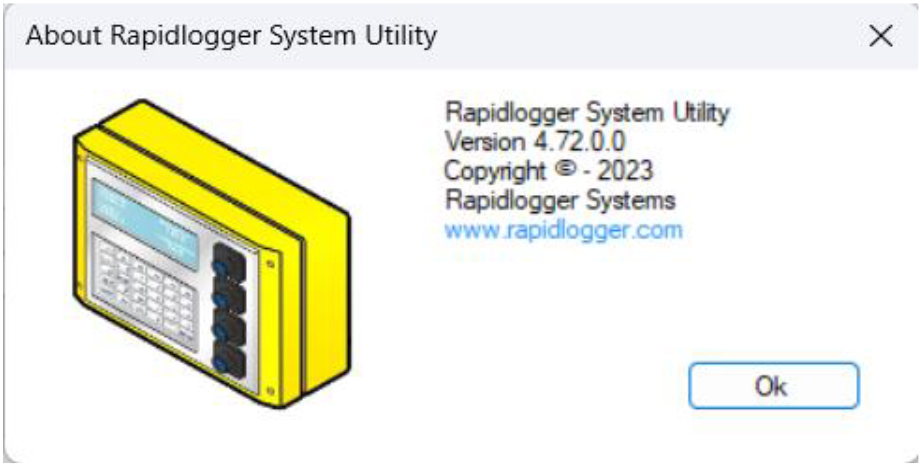
3) You can verify that the program version number is at least 2.1.0.35by clicking on the "About" button. If the version number is lower than 2.1.0.35, please install the correct version.
4) The next step is to read in all of the Rapidlogger Variables from thesystem in to the "Rapidlogger-Utility" program. You can do this byclicking on the "Read All from Unit" button.
5) Click on the up/down arrow next to the Variable Number. As you changethe variable number different variables are displayed on the screen andcan be modified.
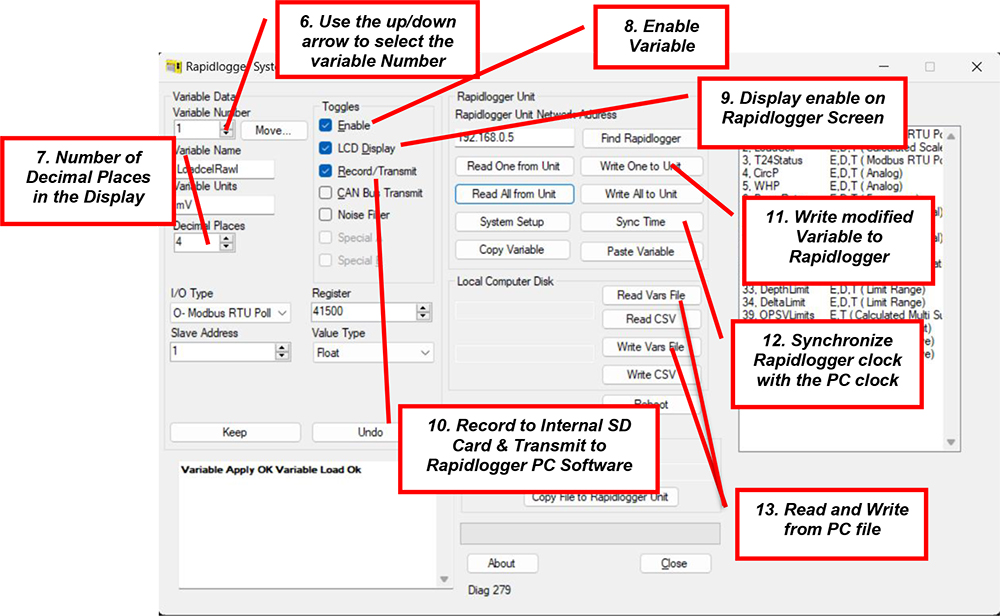
6) Click on the up/down arrow until the variable you want to modify is displayed. Now you can adjust the variable as needed. For example if you want to change the Multiplier for the variable to be a different number you would enter that number in the Multiplier field. The changes are not written back to the Rapidlogger System until the "Write One to Unit" button is pressed.
7) The "Decimal Places" field determines how many decimal places are displayed for a given variable.
8) The "Enable" check box is required to be checked for all variables that need to be calculated by the Rapidlogger System.
9) The "Display" check box is required to be checked for all variables that need to be displayed on the Rapidlogger System LCD screen. Up to a maximum of 6 variables can be displayed.
10) The "Record/Transmit" check box is determines if a variable is going to be recorded to the internal Rapidlogger System SD-Card or not.
11) Pressing the "Write One to Unit" button writes the variable that is currently displayed back to the Rapidlogger System.
12) If the "Sync Time" button is pressed the current time and date on the PC is written to the Rapidlogger System. The Rapidlogger System has an internal battery backed up clock. Normally there is no need to update the Rapidlogger System time. However if the clock seems to not be accurate after a long period of time or the clock backup battery is replaced then the time needs to be synchronized.
13) Using the "Write Var File" function a user can make a backup copy of the Rapidlogger Variable Setup on their PC. This file can be restored at a later date to the Rapidlogger System incase the operator accidently resets the system to its default settings.
Troubleshooting
1) If after making changes you need to change back to the default settings then just reset the unit setup to the default cementing setup.
This can be done as follows
Press F6(Menu) from the main screen on the Rapidlogger panel
Press F6(System) from the next screen on the Rapidlogger panel
Press F4(Setup) from the next screen on the Rapidlogger panel
Press F5(RST) from the next screen on the Rapidlogger panel
Press F1(RstTo Cement) from the next screen on the Rapidlogger panel
Press Enter Key to confirm the reset on the Rapidlogger panel
The unit will now erase all of the modified setting and reset itself to the default Cementing setup as shown in Table 1.
2) Some variables such as Modbus and CAN inputs do not work immediately after setup and require a reboot of the Rapidlogger System. This can be done by powering off the Rapidlogger and powering it back up.