10700 Corporate Drive, Suite 108 Stafford, Texas 77477
Support – Tech Note 49
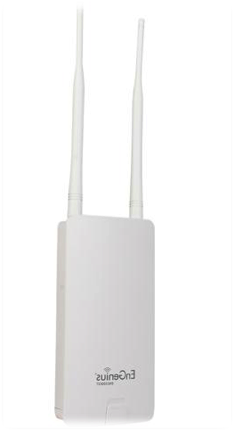
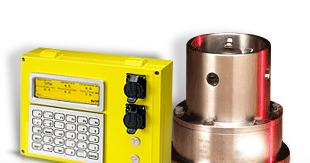
EnGenius ENS202EXT Access Point
This tech note describes how to setup the EnGenius Wi-Fi access point and connect it with the Rapidlogger System. This will allow you to wirelessly communicate between your Rapidlogger System and computer.
Equipment needed:
EnGenius ENS202EXT
2 Ethernet cords
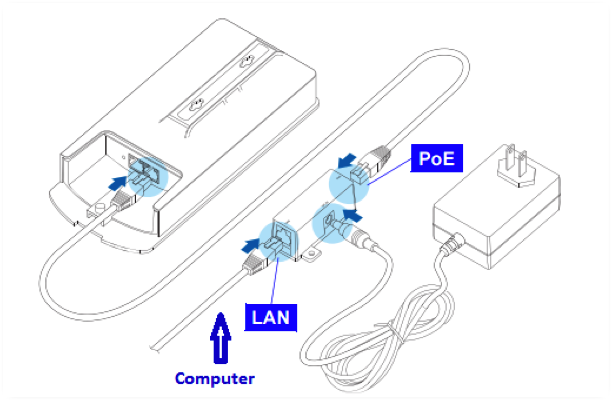
Connecting the AP (Access Point)
Remove the rear bottom panel
Connect one end of the Ethernet cable into LAN(PoE) port of the AP and the other end to the PoE Ethernet port on the PoE injector (For a visual of steps 2-4, refer to Figure 1)
Connect the power adapter to the DC-IN port of the AP and plug the other end into an electrical outlet.
Connect the second Ethernet cable into the LAN port of the PoE injector and the other end to the Ethernet port on the computer.
Place the panel removed from step 1 back into the device.
Screw on the provided antenna/s to the top of device
Figure 1
IP Address Configuration
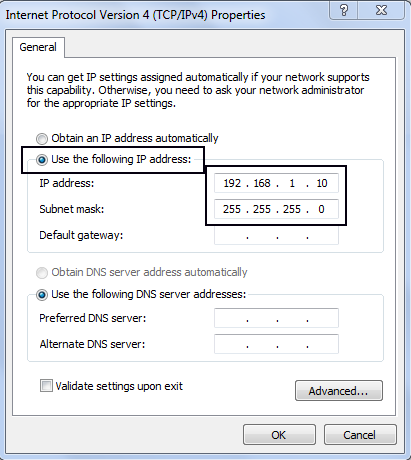
Once your computer is on, ensure that your TCP/IP is set to ON or enabled. Open Network Connections and then click local area connection. Under properties select Internet Protocol Version 4 (TCP/IPv4)
If your computer is already on a network, ensure that you have set it to a Static IP Address on the interface as seen in Figure 3
Figure 3
AP Bridge Setup
Click on the internet symbol located at the bottom right hand corner of your screen. Switch your network to EnGenius shown in figure 4
Figure 4
To configure the AP, open a web browser. In the address bar of the web browser, enter 192.168.1.1 and hit enter
Figure 5
A login screen will appear. By default, the username of the AP is admin and the password is admin. Enter the current username and password of the AP and then click Login
Change Access Point’s Name
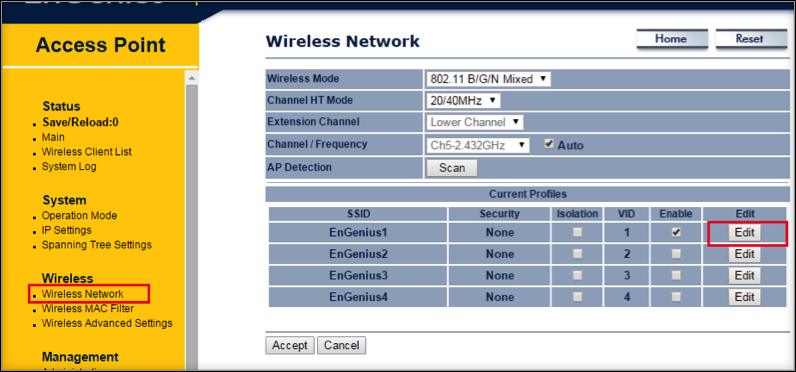
Click Wireless Network under the Wireless Branch as seen in Figure 6.
Figure 6
Click Edit as seen by Figure 6. It will take you to the SSID Profile. Change the SSID from Engenius1 to Rapidlogger.
Click Save
On the left (in yellow) under Status click Save/Reload:
Click Save & Apply
IP Settings
In order to connect with the Rapidlogger, we will set our AP in DHCP mode. We will have to change the IP settings from the default one.
At the end of the URL type in “/html/LANSettings“ as seen in figure 7.
Figure 7
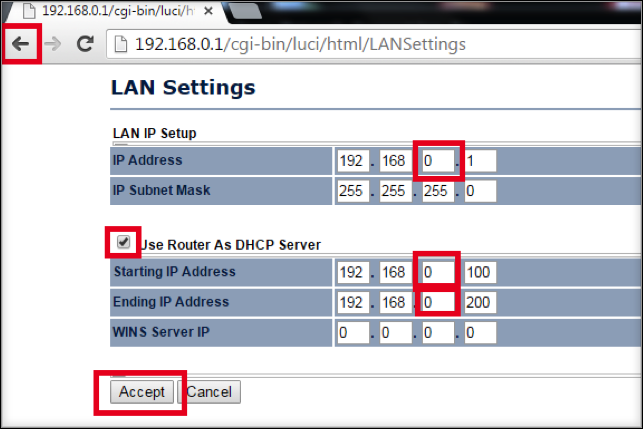
It will take you to LAN Settings screen as seen in Figure 8. You will need to change the following:
IP Address: 192.168.0.1
IP Subnet Mask: 255.255.255.0
Use Router as DHCP Server: Check box
Starting IP Address: 192.168.0.100
Ending IP Address: 192.168.0.200
WIN S Server IP: 0.0.0.0
Figure 8
After it looks like figure 8 click Accept
Double click back button to get back to main screen
Click Save/Reload: as seen in figure 9
Figure 9
Click Save & Apply
It will load new parameters into Access Point
Disconnect the Ethernet from your computer and plug into Rapidlogger. Turn on the Rapidlogger.
Figure 10
Click on the internet symbol located at the bottom right hand corner of your screen. Switch your network to Rapidlogger
Click the internet symbol again and click Open Network and Sharing Center
Select on the left, Change adapter settings
Follow step 7
Switch the setting to obtain an IP address automatically
Click okay
Click okay
Open the internet window again and type in 192.168.0.1
Input
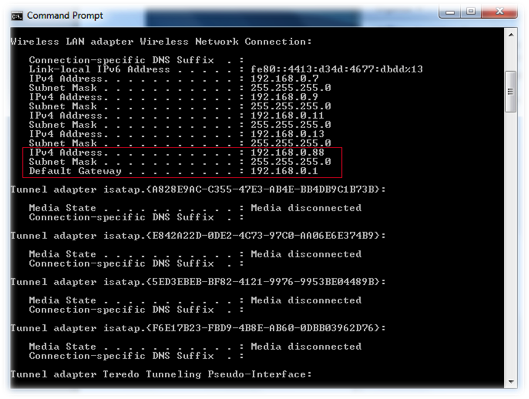
Open command prompt and type in: ipconfig. You should see under Wireless LAN adapter your IPv4 address as in figure 12
Figure 12
Next type: ping 192.168.0.?? (As shown for you) and hit enter. You should see 4 sent and 4 received. This means you are connected/communicating well between your computer to the Engenius.
Now let’s check from computer to Rapidlogger. Type: ping 192.168.0.5 and hit enter. We should see the same, 4 sent and 4 received.
Last go into the RapidVU software and try to run. If Rapidlogger word and circle light up green, then you are connected.
You are now able to communicate to the Rapidlogger system from your computer.
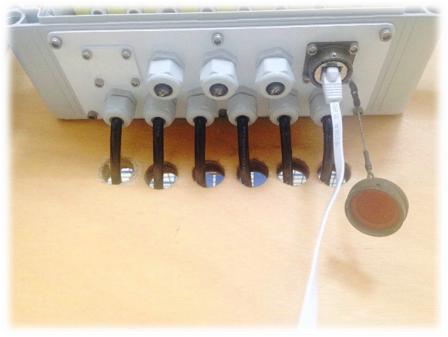
Mounting the WiFi Engenius
Mount your Engenius somewhere close by your Rapidlogger system. This is usually done with tie wraps to a pole as seen in figure 13