10700 Corporate Drive, Suite 108 Stafford, Texas 77477
Support – Tech Note 8
Making Small Adjustments to Rapidlogger Variables from a PC Using the Rapidlogger-Utility
This tech note describes the process to change, update, setup add or remove Rapidlogger Variables from a PC. The program used to do this operation is called the "Rapidlogger Utility". This document describes the use of the "Rapidlogger Utility". You should only use version number 2.1.0.35 or newer versions of this utility program. The program is available on the CD that is shipped with your system. Before using this program the PC should be connected to the Rapidlogger System with an Ethernet cable and the network setup should be completed. The network setup is described in a different document.
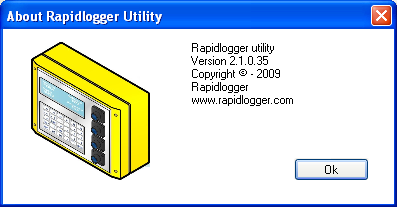
Figure 1: Rapidlogger-Utility Program Version
Installing the Program
The first step is to install the Rapidlogger Utility" program on your PC. To install double click on the setup.exe file inside the Rapidlogger Utility folder on the CD.
Figure 2: Running the Rapidlogger Utility from the Program Menu
Now run the program by clicking on the program icon for Rapidlogger Utility in the program menu.
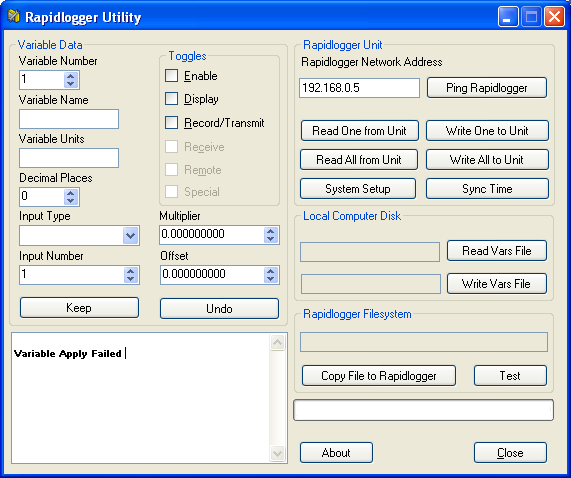
Figure 3: Rapidlogger-Utility Program Initial Screen
Using the Program
The first step is to install the Rapidlogger Utility" program on your PC. To install double click on the setup.exe file inside the Rapidlogger Utility folder on the CD.
Try to ping Rapidlogger System by clicking on the "Ping Rapidlogger" button as shown below.
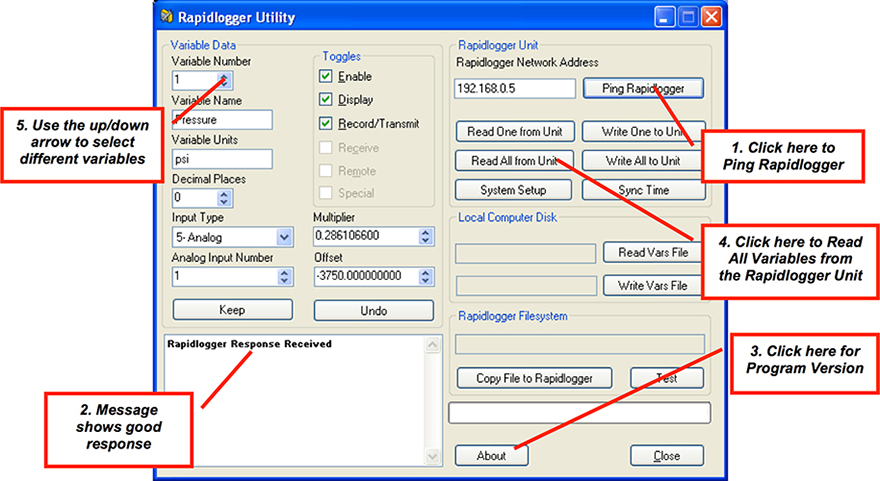
Figure 4: Using the Rapidlogger Utility
If the message in the window show "Rapidlogger Response Received" then you are ready to proceed. If the message shows "Connection to Rapidlogger Failed" then there is a problem with the network connection and you need to check all of the steps in the network setup procedure described in the Rapidlogger Tech Note #5 thoroughly and try again.
You can verify that the program version number is at least 2.1.0.35 by clicking on the "About" button. If the version number is lower than 2.1.0.35 please install the correct version.
The next step is to load or read in all of the Rapidlogger Variables from the Rapidlogger System in to the "Rapidlogger-Utility" program. You can do this by clicking on the "Read All from Unit" button.
Click on the up/down arrow next to the Variable Number. As you change the variable number different variables are displayed on the screen and can be modified.
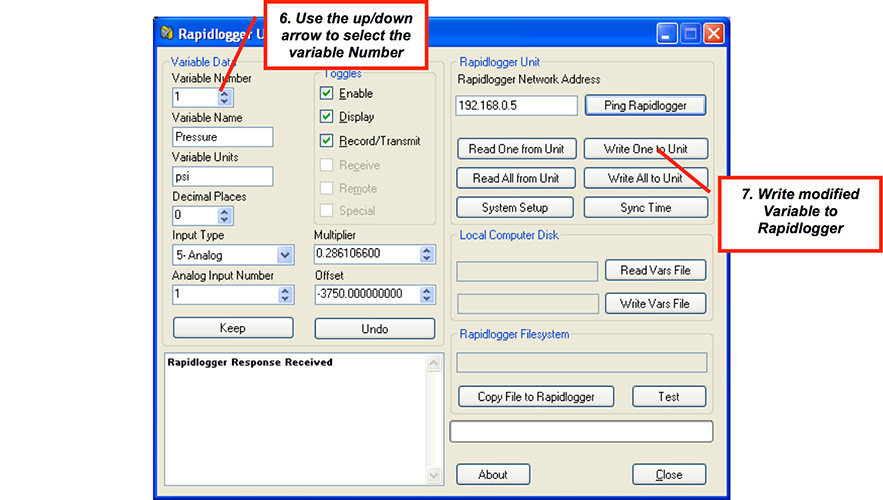
Figure 5: Changing a Variable
Click on the up/down arrow until the variable you want to modify is displayed. Now you can adjust the variable as needed. For example if you want to change the Multiplier for the variable to be a different number you would enter that number in the Multiplier field. The changes are not written back to the Rapidlogger System until the "Write One to Unit" button is pressed.
Pressing the "Write One to Unit" button writes the variable that is currently displayed back to the Rapidlogger System. If you accidently make unintended changes to a variable values then be sure not to “Write” that variable to the Rapidlogger System. Go back to step 4 and start again.
If you want to change the multiplier for pump #1. You have to adjust both the Pump1Rate and Pump1Total variables. First select variable 5 (Pump1Rate) and change the multiplier to the correct value (If you can not determine the correct value for the pump multiplier then please contact the factory by email, make sure you have the following information included[i) Volume pumped for every rotation of the pump ii) number of pulses transmitted by the proximity switch for every pump cycle] ). Now press the button “Write One to Unit”. This writes the variable back to the system. Now the Pump1Total must be adjusted. Select variable 8 (Pump1Total) and change the multiplier to the correct value (The correct value of the Pump1Total multiplier is always 1/60 of the value of the Pump1Rate multiplier). Now press the button “Write One to Unit”. This completes the adjustments to the pump #1.
If you want to change the multiplier for pump #2. You have to adjust both the Pump2Rate and Pump2Total variables. First select variable 6 (Pump2Rate) and change the multiplier to the correct value (If you can not determine the correct value for the pump multiplier then please contact the factory by email, make sure you have the following information included[i) Volume pumped for every rotation of the pump ii) number of pulses transmitted by the proximity switch for every pump cycle] ). Now press the button “Write One to Unit”. This writes the variable back to the system. Now the Pump2Total must be adjusted. Select variable 9 (Pump2Total) and change the multiplier to the correct value (The correct value of the Pump2Total multiplier is always 1/60 of the value of the Pump2Rate multiplier). Now press the button “Write One to Unit”. This completes the adjustments to the pump #2.