

Tech Note 18
This tech note describes how to set the date and time on the Rapidlogger unit by three methods, how to recognise a clock backup battery that has gone flat, how to recover the job data that a flat battery sends to a wrongly named file, and how to replace the battery.
Why the Date and Time Matter
The Rapidlogger names every job file on its SD card after the date on its own clock. The name is the day, the month and the two-digit year followed by .TXT, so a job run on 15 October 2026 is recorded in a file called 15Oct26.TXT. A new file is started when the date changes, and a unit switched on again on the same day appends to the file for that day. Every record inside the file also carries the date and time from the same clock.
The clock runs from the unit power while the unit is on. While the unit is off it runs from a small coin cell on the main board, which holds the date and time for up to 2 years of accumulated power-off time. The cell does nothing else: recording, the display and communications do not depend on it.
How to Recognise a Flat Clock Battery
A flat cell is silent. The unit records, displays and communicates normally. The only thing that goes wrong is that the date and time are lost every time the unit is powered down, and that shows up as follows:
- Jobs run without the PC cannot be found. RapidVu lists the job files by date, and the data for those jobs has gone into a file named with a date years in the past, such as 24Nov75.TXT or 01Jan21.TXT, which no one looks for.
- Jobs run with the PC connected are found as usual. RapidVu sets the Rapidlogger clock every time it connects, so those jobs carry the right date. This is why the problem is easy to mistake for a recording fault.
- The date shown by the unit after a power-up with no PC connected is wrong.
- Only some units in a fleet are affected. Each unit has its own cell and they do not all fail at once.
To confirm it, power the unit down for ten minutes, power it up with no PC connected, and look at the name of the newest job file on the SD card with the USB copy menu (F6 / MENU, F6 / SYSTEM, F6 / USB, then F4 to step through the file names, see Tech Note 19). If the newest file does not carry today's date the clock is not being held through the power cycle.
NOTE: Do not erase the SD card and do not replace it. The missing jobs are on the card, in the wrongly named file.
Recovering the Jobs from a Wrongly Named File
- Copy the wrongly named file (for example 24Nov75.TXT) off the unit to a USB flash drive (Tech Note 19) or download it over the network (Tech Note 23).
- Open the file in Excel as described in Tech Note 53. It is an ordinary Rapidlogger job file.
- Every record carries its own time stamp. The dates will be wrong but the elapsed time between records and all the measured values are correct. Find each job by the gap in the time stamps between one power-up and the next and split the records into one sheet per job.
Replacing the Clock Battery
Every Rapidlogger built in the last ten years uses a CR1616 3 V lithium coin cell. It is a standard cell available locally. Replace it as follows.
- Back up the variables with the Rapidlogger Utility (Tech Note 13). This is a precaution only; the variables are not stored in the cell.
- Power the unit down and remove the power and signal cables.
- Open the lid. Discharge any static from your hands by touching grounded metal or wearing a grounded wrist strap before touching the boards.
- Find the coin cell holder BH1 on the main board. It is at the lower left of the board, next to the digital output terminal block J2 and the keypad connector J3, as shown in Figure 1.

Figure 1: Main board 00-92203 with the CR1616 holder BH1 at the lower left
- Measure the old cell with a multimeter before removing it. A healthy cell reads close to 3 V. Below about 2.5 V it will no longer hold the clock through a power-down. Note the reading.
- Slide the old cell out of the holder and slide the new CR1616 in with the positive (+) side, the side with the markings, facing up away from the board.
- Close the lid, reconnect the cables and power the unit up.
- Set the date and time by one of the three methods below.
- Power the unit down for ten minutes and power it up again with no PC connected. Check that the date and time are still correct. If the unit has gone back to an old date the cell is not holding and the unit needs to come in for repair.
- Run one short job with no PC connected and confirm that a file named with today's date appears on the SD card.
NOTE: Firmware 9.9c and later never sets a date earlier than 1 January 2021. On those units a flat cell sends the standalone jobs to a file dated January 2021, such as 01Jan21.TXT, instead of 1975. A file dated 1975 therefore also tells you that the unit is running firmware older than 9.9c. The current firmware release is 9.13c. In both cases the data is safe and the cell still needs to be replaced.
Setting the Date and Time by Using the RapidVu Program
The RapidVu program can set the date and time on the Rapidlogger unit. Use program version 4.1 or newer. The program is on the flash drive shipped with your system or can be downloaded from the Rapidlogger.com website. Connect the PC to the Rapidlogger with an Ethernet cable or WiFi and complete the network setup first. The network setup is described in a separate tech note.

Figure 2: RapidVu program Time Sync
In RapidVu go to the Tools menu and select Rapidlogger System Hardware. Click Sync Time. This sets the time and date on the Rapidlogger to match the time and date on your computer. RapidVu also does this on its own every time it connects to the unit.
Setting the Date and Time by Using the Rapidlogger Utility Program
The Rapidlogger Utility program can also set the date and time. Use version 2.1.0.50 or newer. The program is on the flash drive shipped with your system. Connect the PC to the Rapidlogger with an Ethernet cable and complete the network setup first.
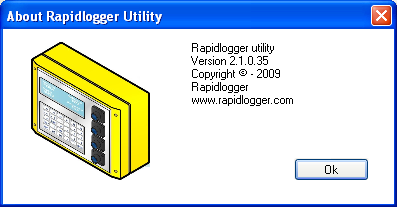
Figure 3: Rapidlogger Utility program version
Install the Rapidlogger Utility on the PC by double clicking setup.exe inside the Rapidlogger Utility folder on the flash drive, then run it from the Start menu.
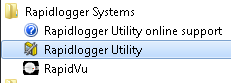
Figure 4: Running the Rapidlogger Utility from the Start menu
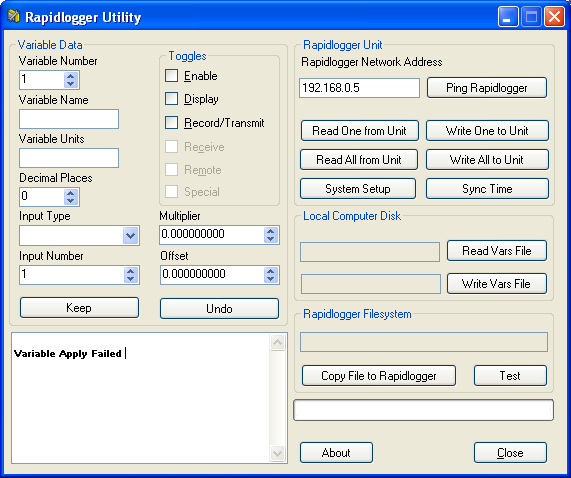
Figure 5: Using the Rapidlogger Utility
Click Sync Time. When the message window shows "Time set" and "Done" the time is set. Power the Rapidlogger down and back up for the new date and time to take effect.
Setting the Date and Time by Using the Rapidlogger Keypad
Press F6 / MENU, then F6 / SYSTEM, then F3 / TIME. The unit asks for the day, the month and the year, and then for the hour, the minutes and the seconds. Enter each value and press ENTER. Power the Rapidlogger down and back up for the new date and time to take effect.
The date and time are now set, and with a good clock battery the unit keeps them through every power-down.