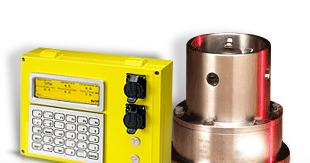
This tech note describes a checklist to run through the first time a new or replacement Rapidlogger main board or CPU module is powered on in the field, before assuming a hardware defect and initiating an RMA. Many first power-on issues are configuration or firmware related rather than a hardware fault.
Note that boards are commissioned at the factory through a separate and more involved process before shipping. The checklist below covers first power-on in the field after a board has been fitted to a unit.
Before Power-On (Replacement Boards Only)
- If this is a replacement for an existing unit, confirm a current variable backup was taken from the old board before it was removed (Tech Note 13). If no backup exists, obtain the customer's variable list, or the default application variable list (Tech Note 11 for Cementing, or the applicable list for the ordered application), before proceeding.
- Follow the physical replacement procedure in Tech Note 44.
First Power-On Checklist
- Power up the unit and observe the boot sequence on the LCD front panel. Confirm the serial number displayed (Tech Note 2) matches the unit's paperwork and order.
- If the unit does not boot at all, check the main fuse and LED status (Tech Note 32).
- Check and record the firmware version against the latest available release (Tech Note 3). Update it if the board shipped with an older version.
- Check the date and time (Tech Note 18). If it is wildly incorrect, the CR1616 coin cell that backs the real time clock may be dead or missing, and should be addressed now rather than after deployment.
- Confirm the correct default variable list is loaded for the application the unit was ordered for (Tech Note 11 for Cementing, or the applicable list for Fracturing, Coiled Tubing and so on). A board can boot successfully with the wrong application variable set loaded, which looks like a defect but is a configuration mismatch.
- If this is a replacement board, restore the customer's backed up variables (Tech Note 43) and verify each critical variable (pump rate and total, pressure, density, and so on) reads correctly against a known test input before returning the unit to service.
- Power cycle the unit two or three times and confirm the settings persist. If they do not, see Tech Note 100.
If a Problem Is Found
If the unit fails any of the checks above and the issue cannot be resolved through a firmware update, a variable restore, or fuse replacement, contact support with the serial number, the firmware version, and specifically which checklist step failed, before initiating an RMA.